For years, I have strongly disliked subscriptions when it comes to music. You pay for a membership to listen to a song, and the next month you cannot use it unless you keep paying. That feeling really bothers me. Music is not software; it does not keep receiving updates. I am not particularly enthusiastic about discovering new songs either. I dislike this model. I have been downloading music for offline listening since high school, and at university I would download it into Apple Music. Recently, more and more songs have required a subscription, while music apps have become increasingly bloated: too many buttons, too many ads, and different categories of charges. It is not that they are expensive. It is that I have neither a sense of security nor a real choice.
What could I do? In the past, I relied on Chrome's developer tools. I would quietly open developer mode, find the actual download URL for a song, and use something like wget to download it. But yesterday, I discovered that the service had changed. In the Network tab, all I could see were chunks and blob data encoded in ways I did not understand. I could no longer find an m4a or mp3 URL. I searched GitHub for projects that could decrypt the mgg music format. I also tried asking GPT5, which more or less gave me a slap in the face: because the music was protected by DRM, it refused to help analyze the encryption or methods of decryption.
All right, then. I would have to use the most basic approach: internal audio recording, which sidesteps the whole encryption problem. Apple's hardware is excellent, and for someone like me, who is not particularly demanding about sound quality, it is more than good enough. This post records how I saved music I wanted to hear locally on macOS, without relying on a decryption algorithm.
A reminder, of course: the resulting music files must not be used commercially. Infringing on someone else's work is unethical. For personal use, though, I feel it is harmless. I believe that choice belongs in my own hands and is nobody else's business.
Setting Up
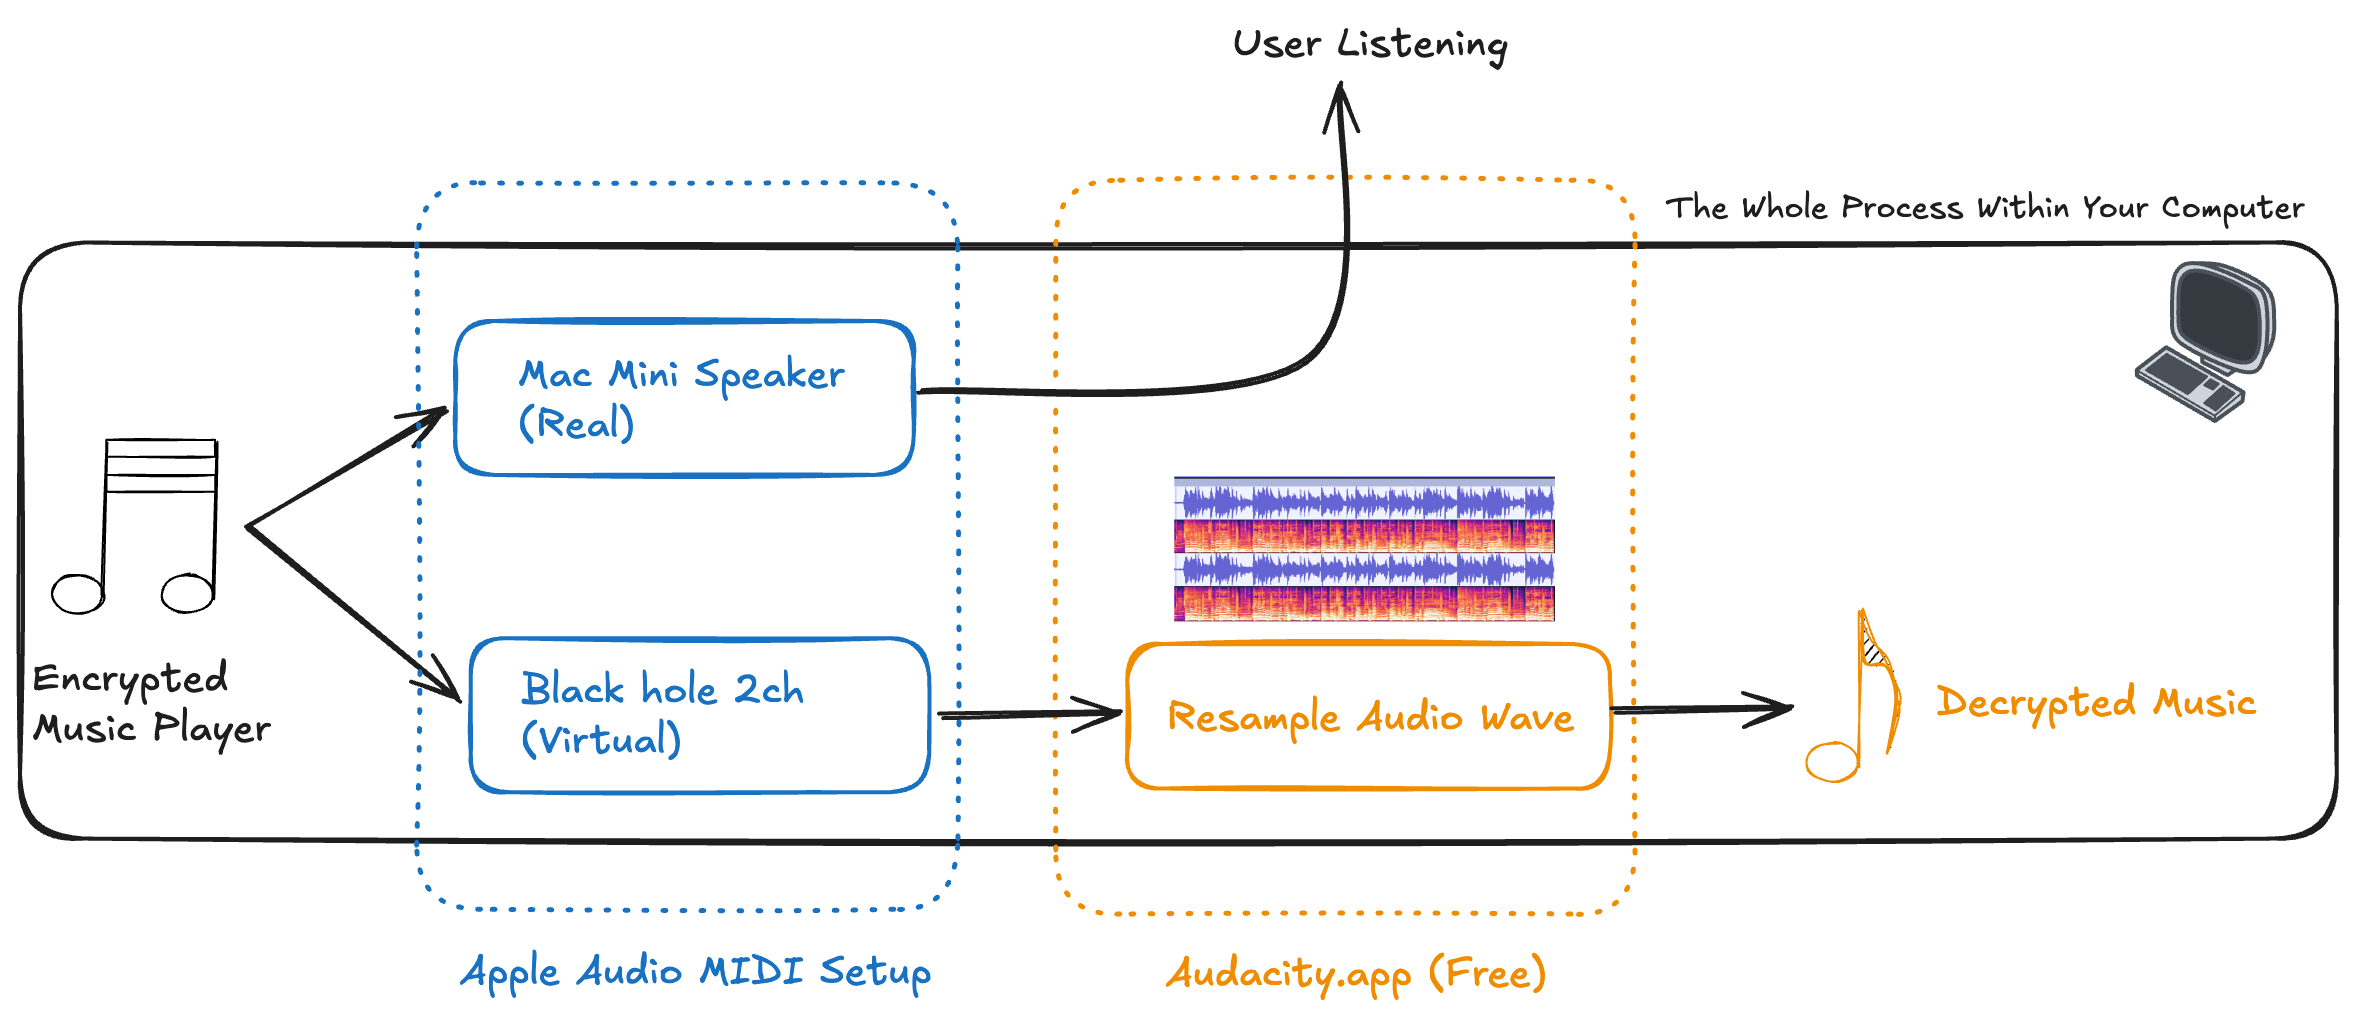
The principle is simple. A music app sends audio both to a physical output device, such as the Mac mini speakers, and to a virtual device we set up, such as BlackHole 2ch. We play the music, use recording software to sample the audio inside the computer, and save it in the format we need. The process looks roughly like this:
It really is quite simple. Let's set up the environment.
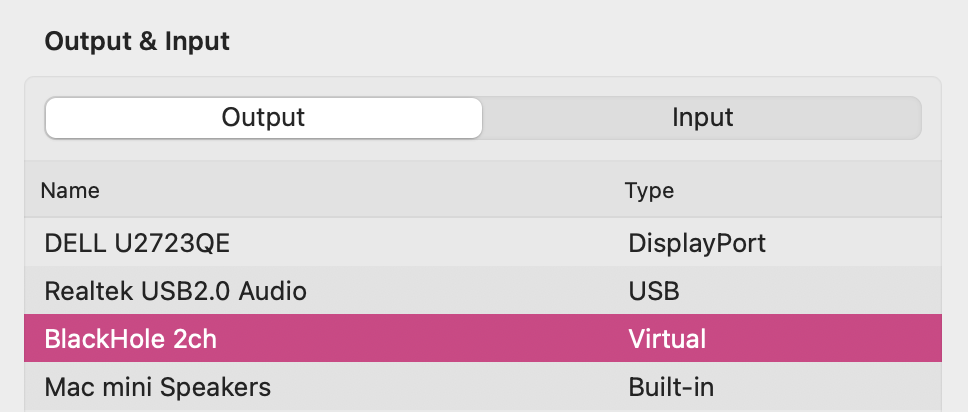
1️⃣ First, download BlackHole. It is a virtual audio device that lets us handle the operating system's audio as a digital signal. Regrettably, I have not donated yet; if I end up using it regularly, I will consider supporting the author. The software is tiny, less than 1 MB. After installation and a restart, a new virtual device appears under “System Settings → search for audio → Output.” Here, “2ch” means two channels, which is enough for most users.
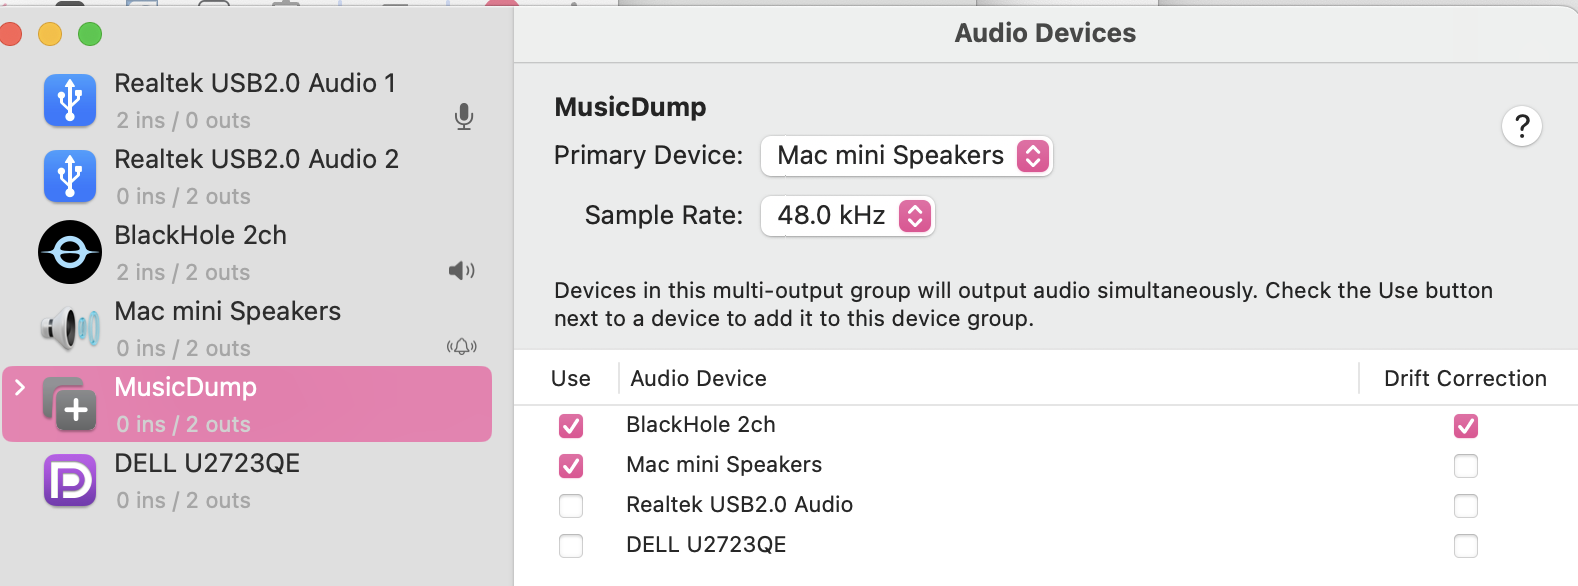
2️⃣ Next, search Spotlight for “Audio MIDI Setup.app,” Apple's built-in audio configuration tool. MIDI stands for Musical Instrument Digital Interface. In this step, we create an output device that sends audio to both the physical hardware and the virtual audio device, as shown below:
“Primary Device” means that this device acts as the clock source. Because we are using multiple devices, the system uses this device's clock as its reference, while the others use “Drift Correction” to stay aligned.
A sample rate of 48 kHz means taking 48,000 samples of the audio waveform every second. That is a very high frequency. To my ears, the original sound and the sampled result are essentially indistinguishable; besides, the best-quality audio in music apps generally does not exceed 48,000 samples per second.
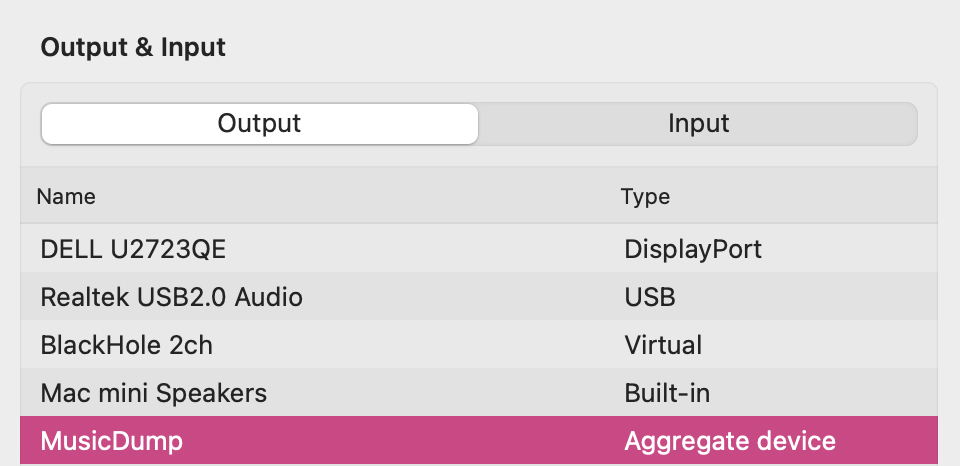
Once this is configured, our virtual multi-output device should appear among the available output devices, as shown in the image on the right.
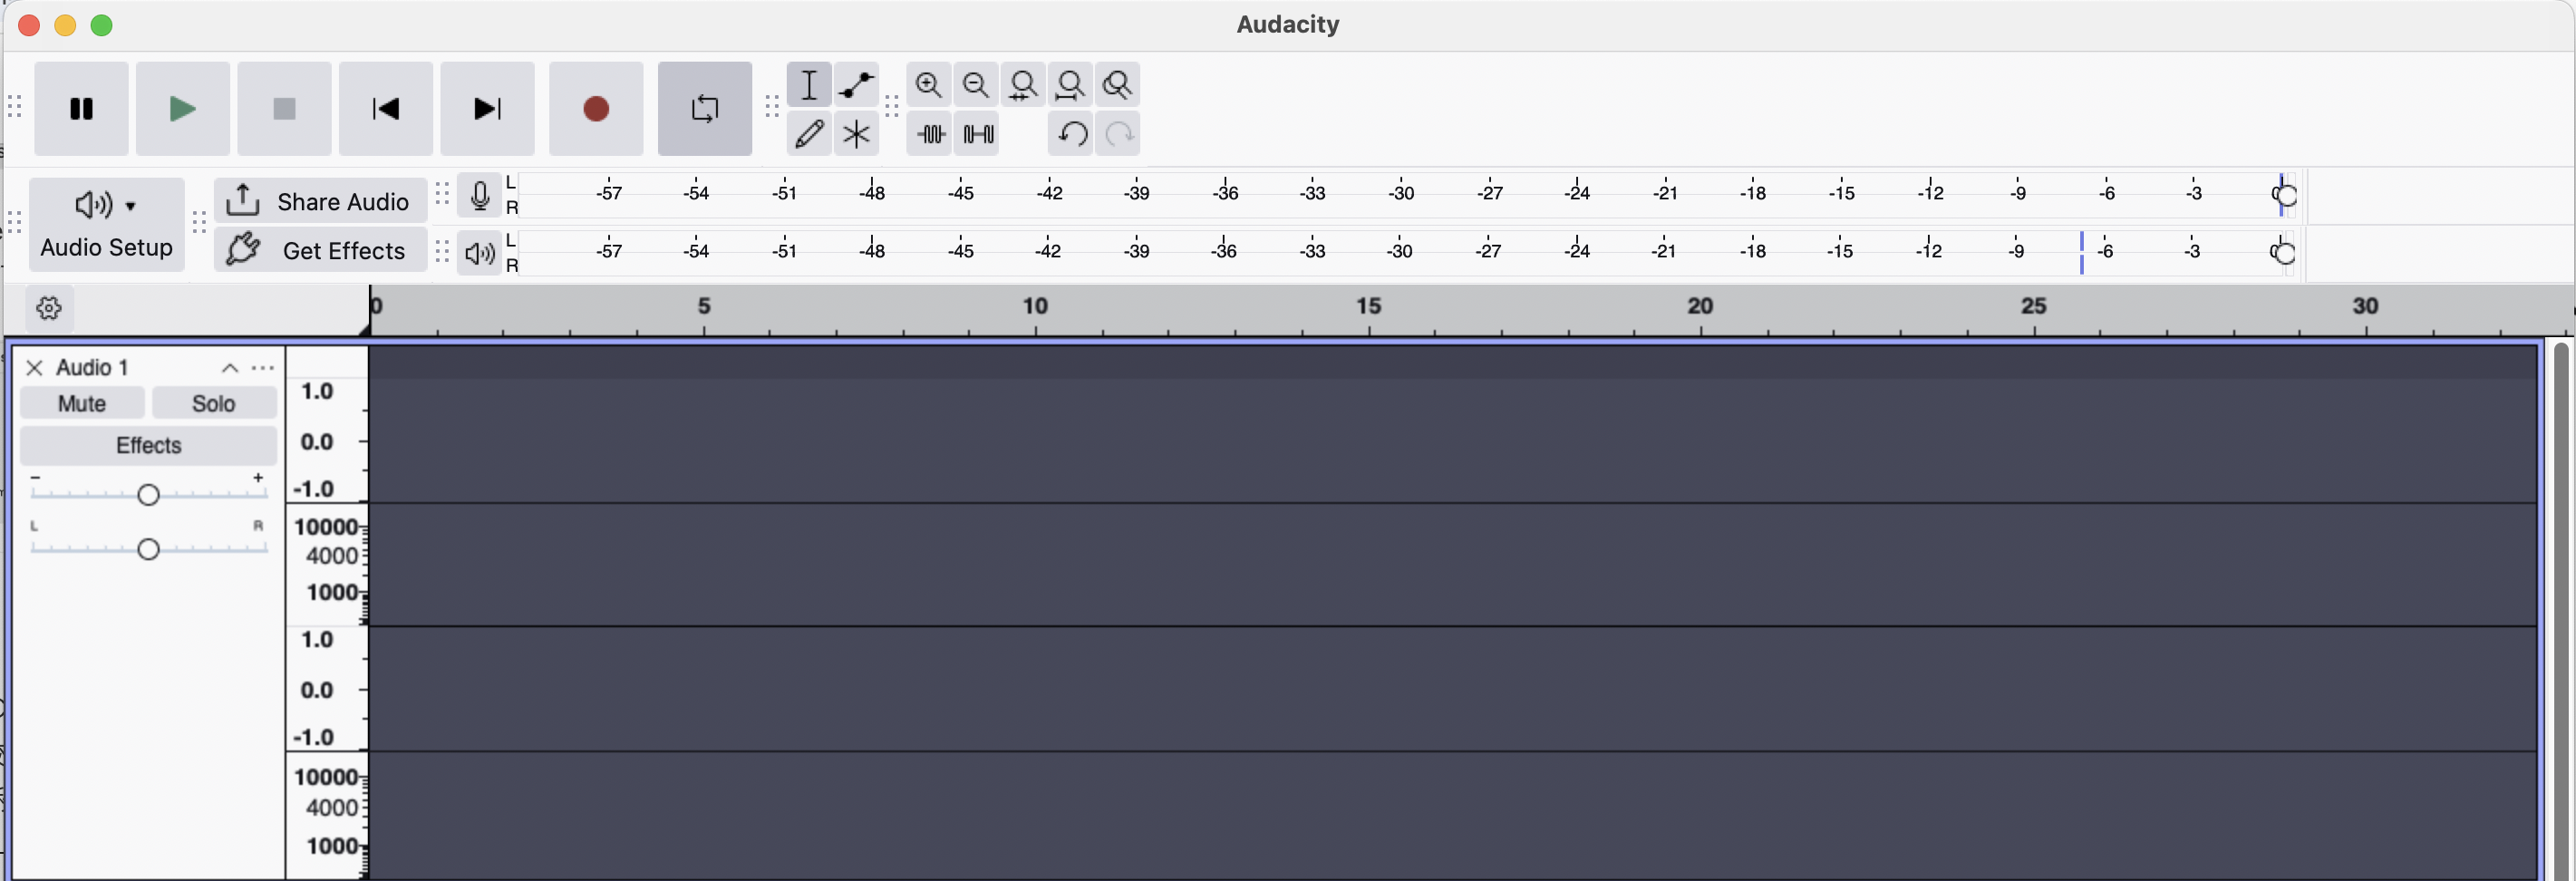
3️⃣ Download the open-source application Audacity. Choose the download without Muse Hub. We need to configure its input and output devices. Click “Audio Setup,” choose Mac mini Speakers as the Playback Device, BlackHole 2ch as the Recording Device, and 2 as the number of Recording Channels. In Audio Settings, I chose a sample rate of 44 kHz.
Resampling the Audio
First, select the combined device as the Mac's audio output. I named mine MusicDump. Then press Audacity's record button—the red circle—and quickly open the music app. You may need to pay for a membership first. Play the song from the beginning. Audacity should display the recorded waveform correctly, and the audio quality should be quite good.
Next, we need to think about exporting. There will probably be silence at the beginning and end that needs trimming. Audacity already has a tool for this. From the top menu, choose “Effect → Special → Truncate Silence” and set the parameters you need. Remember to select the audio to process first: Command+A selects everything, or you can select the relevant section manually.
Finally comes saving the file, which is also the most interesting part because it touches on some audio basics. Choose “File → Export Audio” from the top menu to open the export settings:
WAV: Lossless. It preserves the captured digital signal in full. For example, there might be 48,000 samples per second, with each sample stored as a signed 16-bit value. A song lasting a few minutes is typically around 20–30 MB.
MP3: Lossy, and the most widely supported format. The sample rate stays the same, but the bitrate—the amount of data available per second, perhaps around 170–210 kb—limits file size. Constant bitrates are also available, such as a fixed 192 kb per second. With data capacity as the upper bound, the file size is constrained; as I understood it, the trade-off is that some values with a very high dynamic range get cut off.
M4A: Lossy, with a compression algorithm somewhat better than MP3. Roughly speaking, 256 kbps can achieve audio quality comparable to a 320 kbps MP3.
And that is how I saved a song I liked locally, bypassing the need to deal with complicated music encryption and decryption algorithms.
A Final Thought
I remember reading an essay by He Caitou many years ago titled “Defend Your Rights.” For me, being able to download video and audio freely, and choose how I pay, may also be a way of defending my rights.